Check out additional BILL resources
Learn moreDon’t you wish you could pay all your vendors by credit card? When you use credit cards to make payments, you can earn card rewards, like miles or points for travel or even cash back. Using a credit card also enables you to defer payments and better manage your cash flow. And card payments offer greater security and protection than paying by check: the money doesn’t come directly out of your bank account and payments don’t run the risk of being lost in the mail. In short, credit card payments are faster, easier, and more easily trackable.
So using your credit card to pay all your vendor bills would be great … but, unfortunately, many vendors don’t accept credit cards.
Fortunately, now there’s BILL Pay By Card. With our new offering, you can now make vendor payments with your credit or debit card, even if the vendor doesn’t accept card payments!
How does this work? When you use your credit card to pay vendor bills and invoices via Pay By Card, BILL charges your card for the payment (plus an industry standard 2.9% transaction fee) and then pays your vendor via ACH or check.
Step 1: Add a credit card
Here are step-by-step instructions for how to start paying vendors with your credit card through BILL Pay By Card—and start reaping the rewards.
Add your card to your account in advance
To enter a card into your BILL account, go to your settings and select Card Accounts under Your Company.
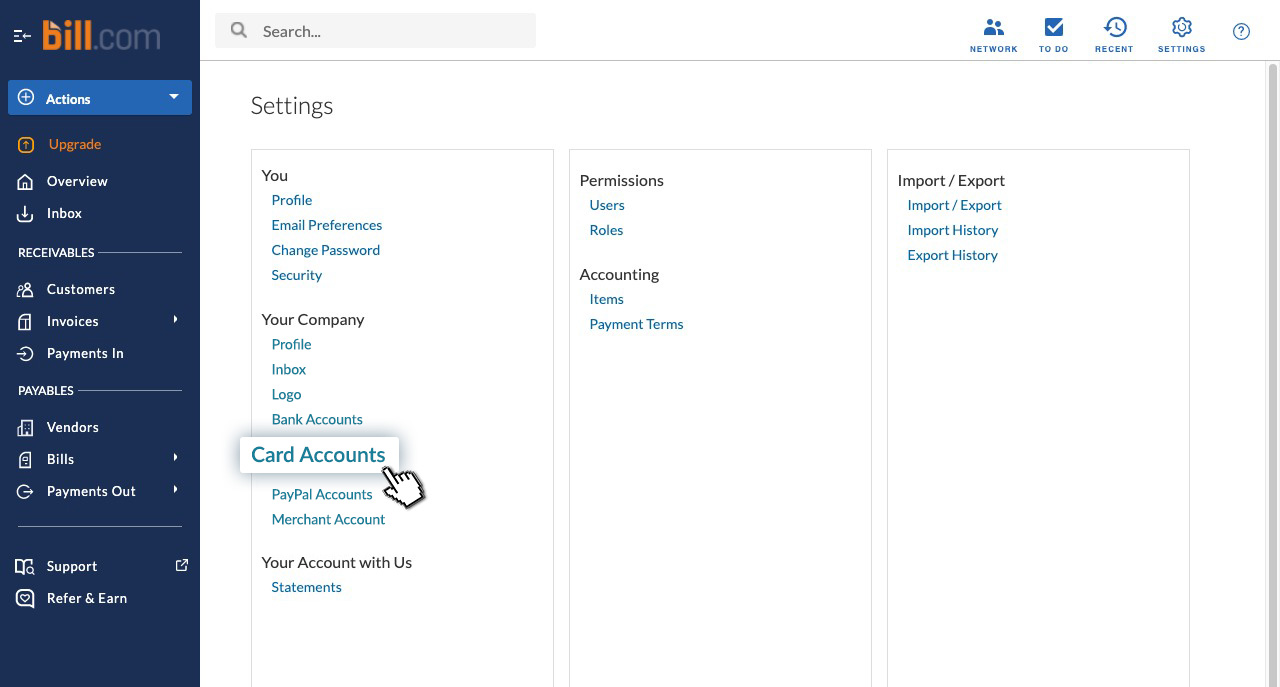
Select Add New Card and enter in your card information.
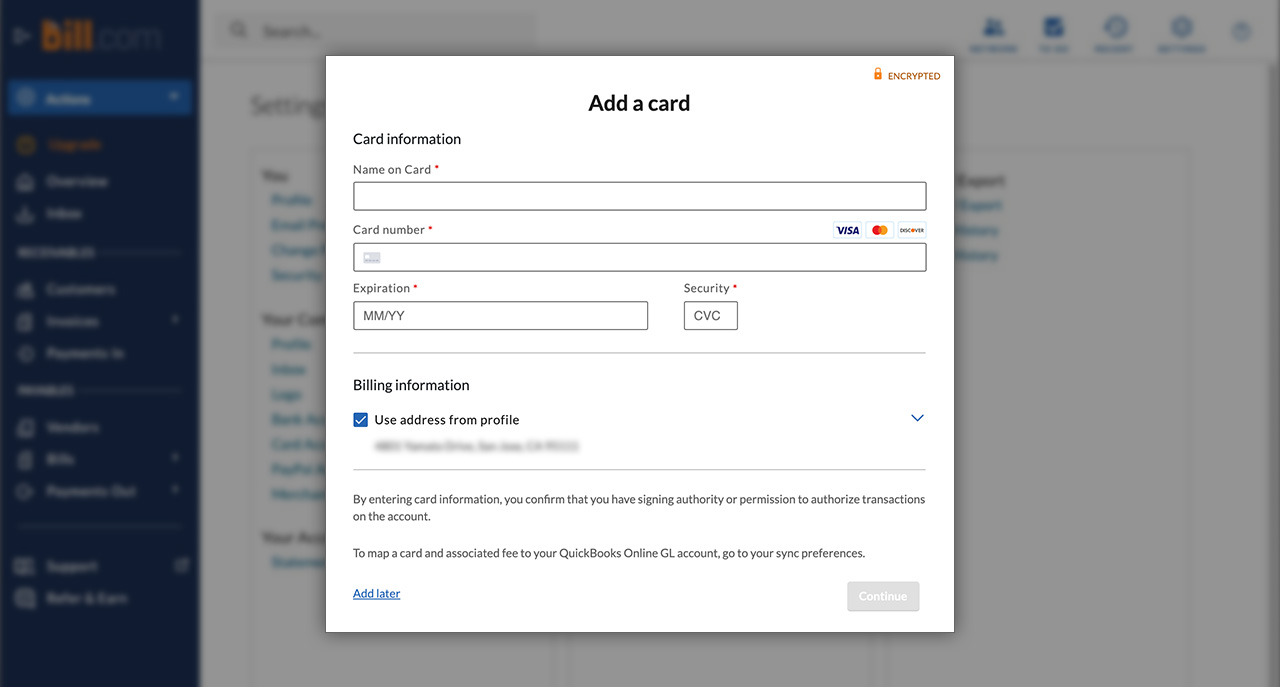
The next time you pay a bill or a vendor, the added card will appear as a payment option that you can select.
Add a card during the payment process
The other way to add a card is when you are paying a bill or vendor in BILL. On the Pay a Bill or Pay a Vendor page, you can add a card within Payment Details by selecting Add a new payment method, then Credit or debit card, and then entering in your card information.
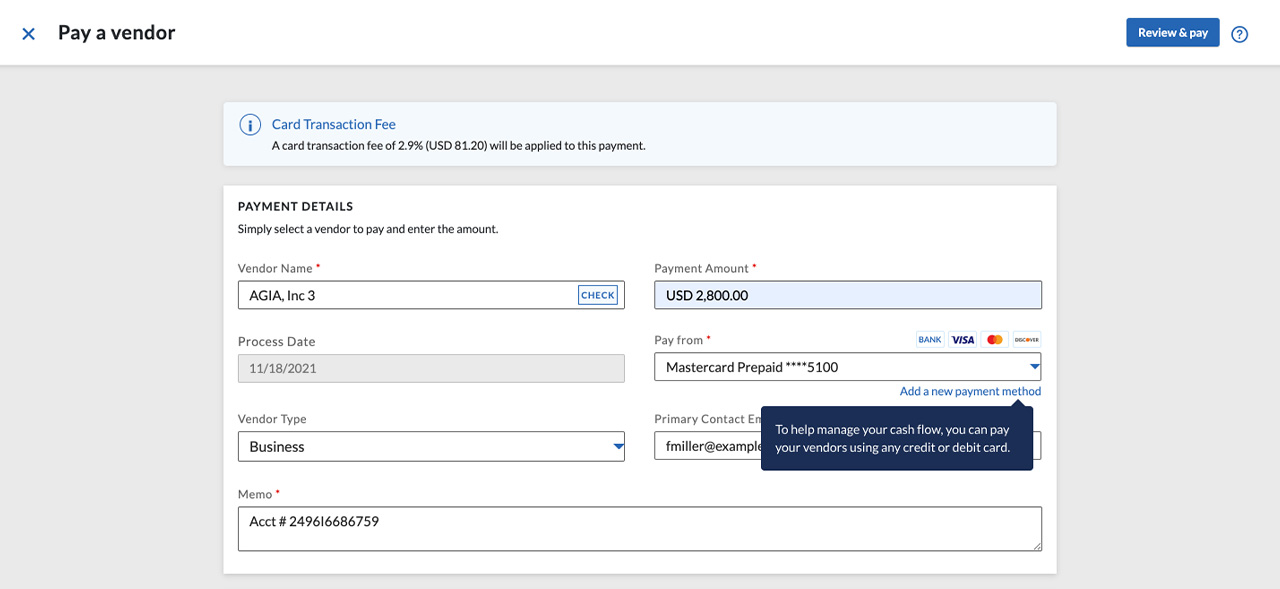
Once you are done entering all your payment information, select Review & Pay to proceed.
Tip: You can add multiple credit or debit cards to your account and use different cards to pay vendors.
Step 2. Review & pay
Once you’ve entered in your credit card information, you can review all your payment details, including payment amount, process date, and estimated payment date of arrival to your vendor.
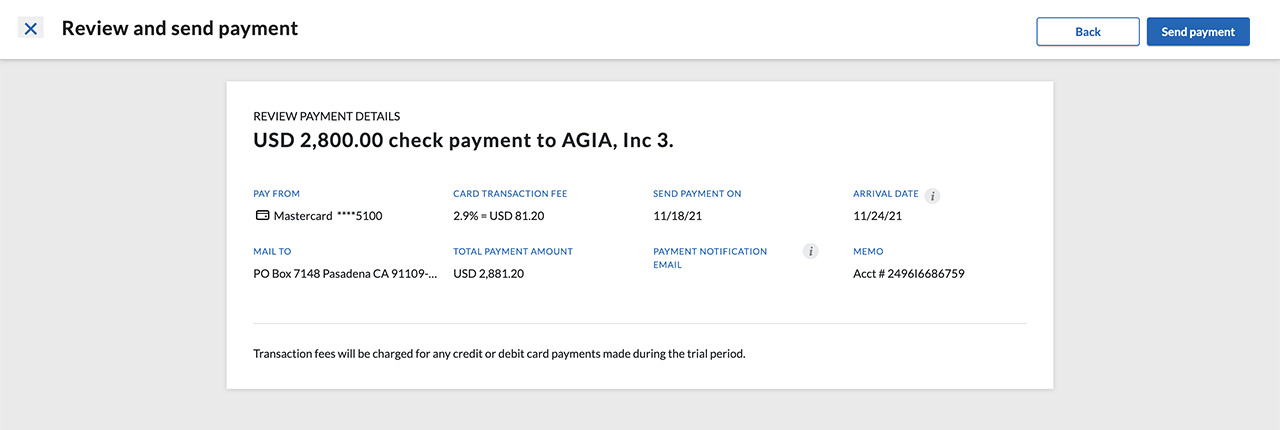
If everything looks good, select Send Payment to charge your credit card.
Step 3. Receipt & statements
With your payment processed, you can check the status of your payment and verify when the vendor has received your payment.
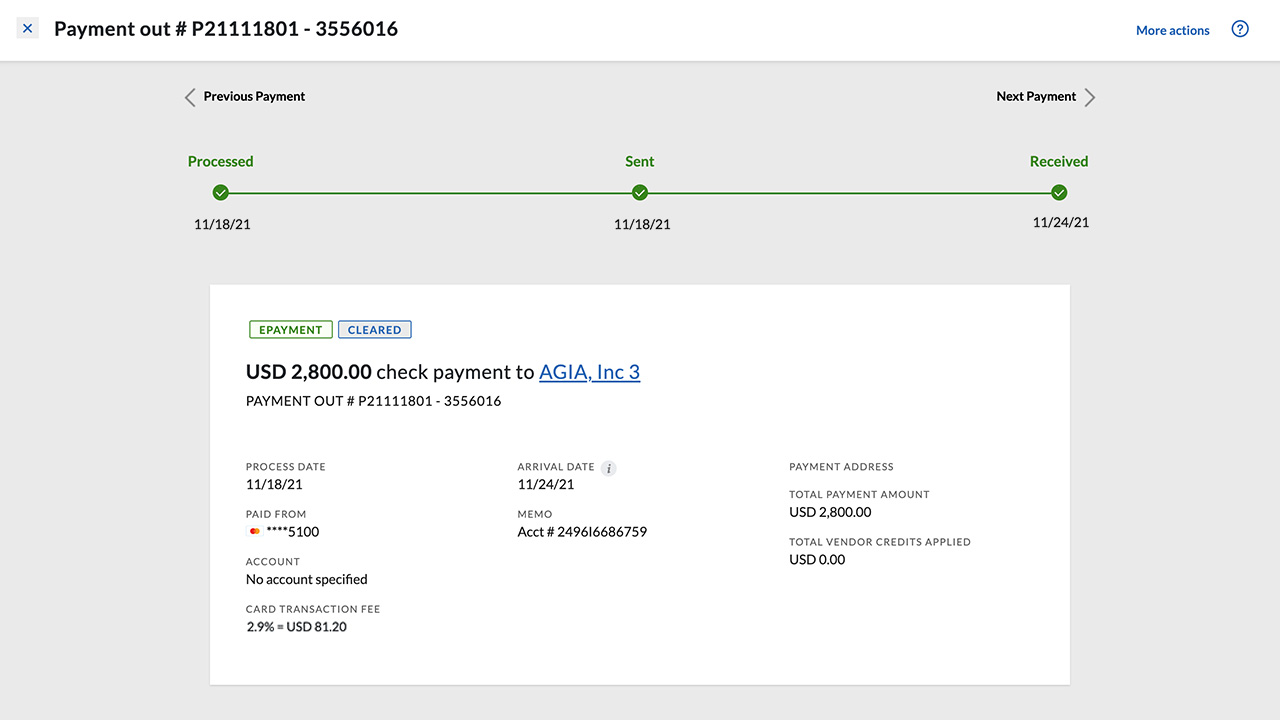
When you receive your credit card statement, you’ll see each transaction listed as a payment to BILL, along with the name of the vendor you are paying. The total transaction will be for the amount you paid the vendor plus the additional 2.9% transaction fee.
Earn card rewards and better manage cash flow
That’s it! It’s pretty simple. And much needed.
So the next time you receive an invoice from one of your vendors, you now have the option to pay them with your credit card—to earn rewards and defer payments to better manage your cash flow. And by bringing card-funded payments onto a single trusted payments platform, you reduce the need for additional tools, systems, and processes. With all your payments in one place—from credit card payments to ACH to international wires—you simplify your payment operations and save valuable time.
If you’re already a BILL customer, you can get started with Pay By Card today.
If you’re not yet a customer, check out more information about BILL Pay By Card in our Pay By Card FAQ, or get started with your risk-free trial, and you could make your first payment today.


